One of the most intimidating pre-apprentice tasks for me was constructing my mews. Largely, I found this a bit overwhelming because I lacked essentially all of the knowledge and skills necessary to make a building, excepting perhaps laying shingles. Each step had to be researched, second guessed, and researched again prior to doing it. I should note that I am not a carpenter, contractor, or builder of any stretch. If you’re hiring a professional to build your mews, great! Follow their advice, it’s what you’re paying them for.
If you’re reading this thinking of becoming a falconer, but haven’t passed your exam yet – go back. You don’t need a mews until you have passed your test and found a sponsor. Your sponsor will likely have valuable advice – as mine did – on mews construction. Listen to them, then come back if you like and see what I did.
We began construction on May 12 and completed the first chamber on July 5.
Budget and tools
The following tools are must haves, but you may want others:
- Electric drill
- Level
- Screwdriver
- Sledgehammer
- Shovel and pick
- Hammer
- Wrench or socket set
- 4″ clamps (bigger is nice)
- Step ladder
- Circular saw and saw horses
You’re also going to want a good supply of deck screws, lag bolts, hex nuts and bolts at least 3″ in length, 1×2″ galvanized mesh, lumber, shingles, roofing cement, gap filler, dowels, hinges, concrete block, doors, siding, possibly a shop sink and drain of some kind, a method to bring water into said sink, and appropriate wiring if you’re adding electricity (and an electrician or that skill set yourself).
I budgeted $3,000 for this project. Then I over constructed the roof and added electricity, so the final budget looked more like $4,000. You can do this for much, much less money if you’re inclined, or have an old shed to transform, or don’t have to move part of a hill to do it. Again, the adage that falconry is not a rich man’s sport, but nor is it a poor man’s, applies. Spend what you need to, your hawk, and you, will be better for it.
Mews footer and initial considerations
We live in a valley, so the first issue I had to overcome was a lack of flat land in proximity to our house. We have a tractor with a bucket, so some excavation was possible. After a little research I determined I would have a stronger foundation if I dug into the hill, than if I tried to build up a low spot.

After digging this space out, I constructed a low retaining wall from concrete blocks against the cut into the hill, pictured above. I then back filled clay, stone and earth behind the wall and hosed it down so that it would settle more quickly. Periodically throughout constructed I added more fill to the top of this wall,so that as it settled I had a firm backing.
Mews foundation
This is an area that I could have improved upon. A critical step in mews construction is being sure that no animals can tunnel or burrow into your chambers or weathering yard. Typically, this is achieved by burring galvanized wire beneath the structure. I build a frame of 2x6x8 pressure treated lumber and poultry stapled one layer to the underside. Framing posts were then driven into the ground at the corners of the structure – however, due to the ground I chose, these posts were extremely difficult to dig deep enough holes into. The hillside contained boulders that are, in at least one case, larger than a person, and impossible to move. In these cases the posts were not buried as deeply as I’d like. On the other hand, they have a boulder a as a foundation, sooo…
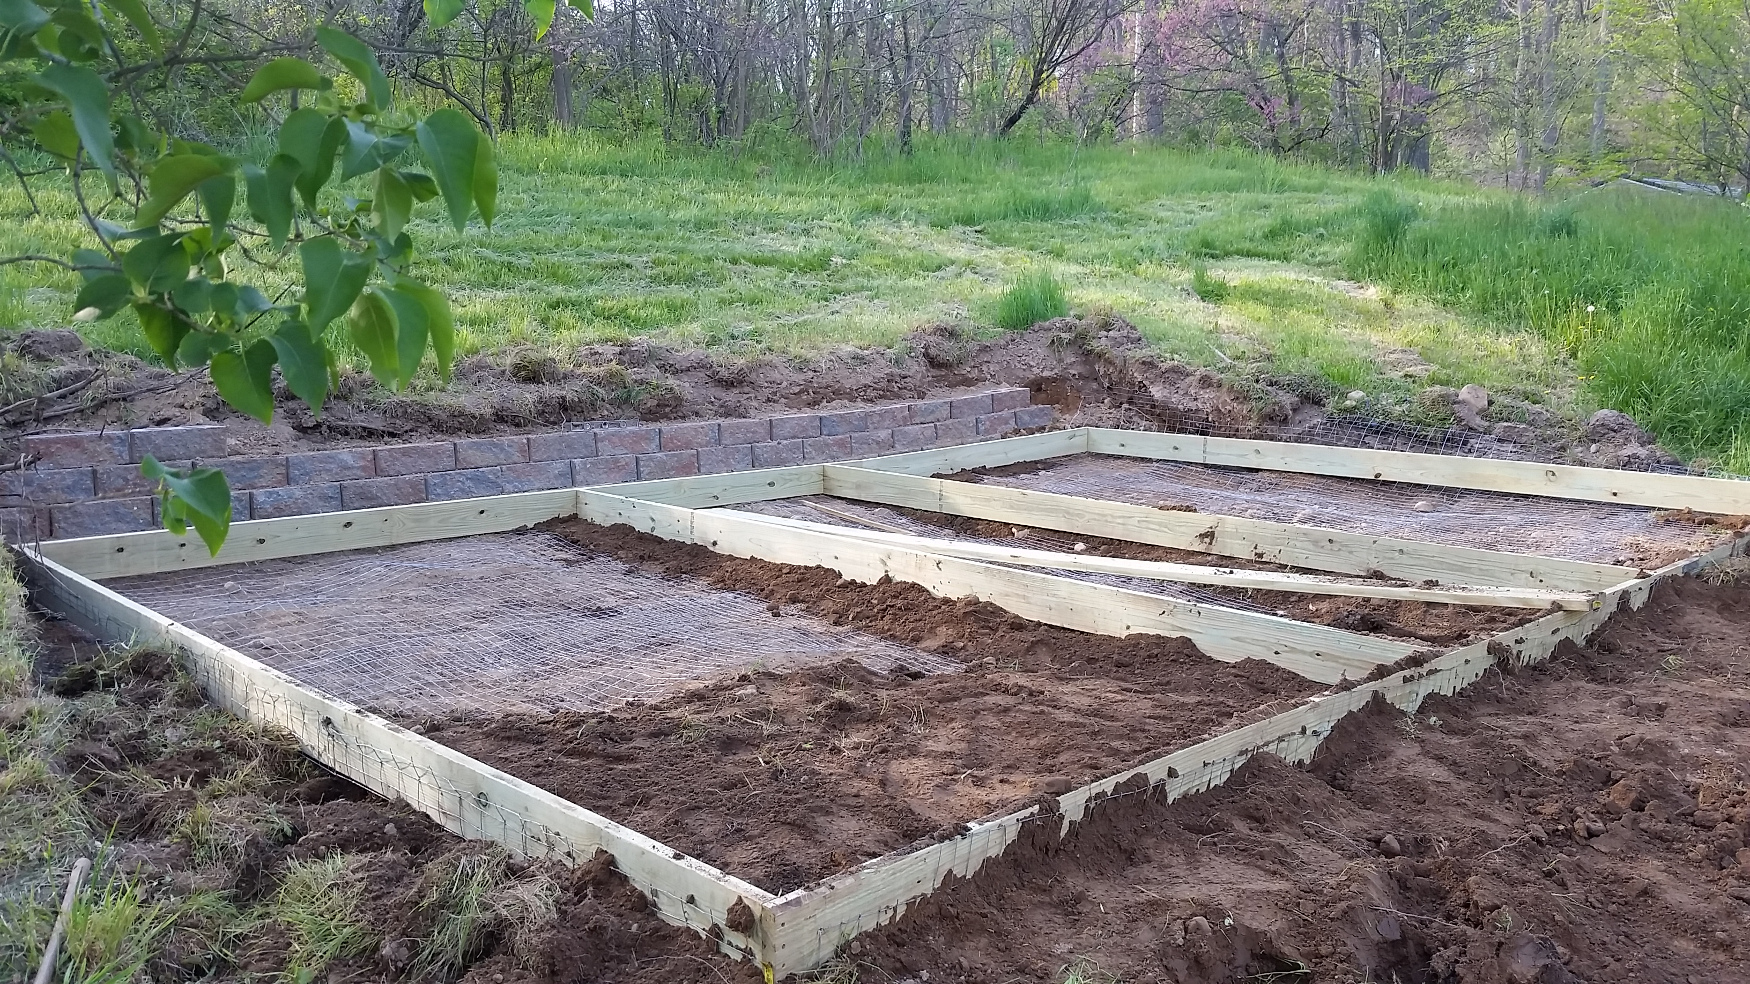
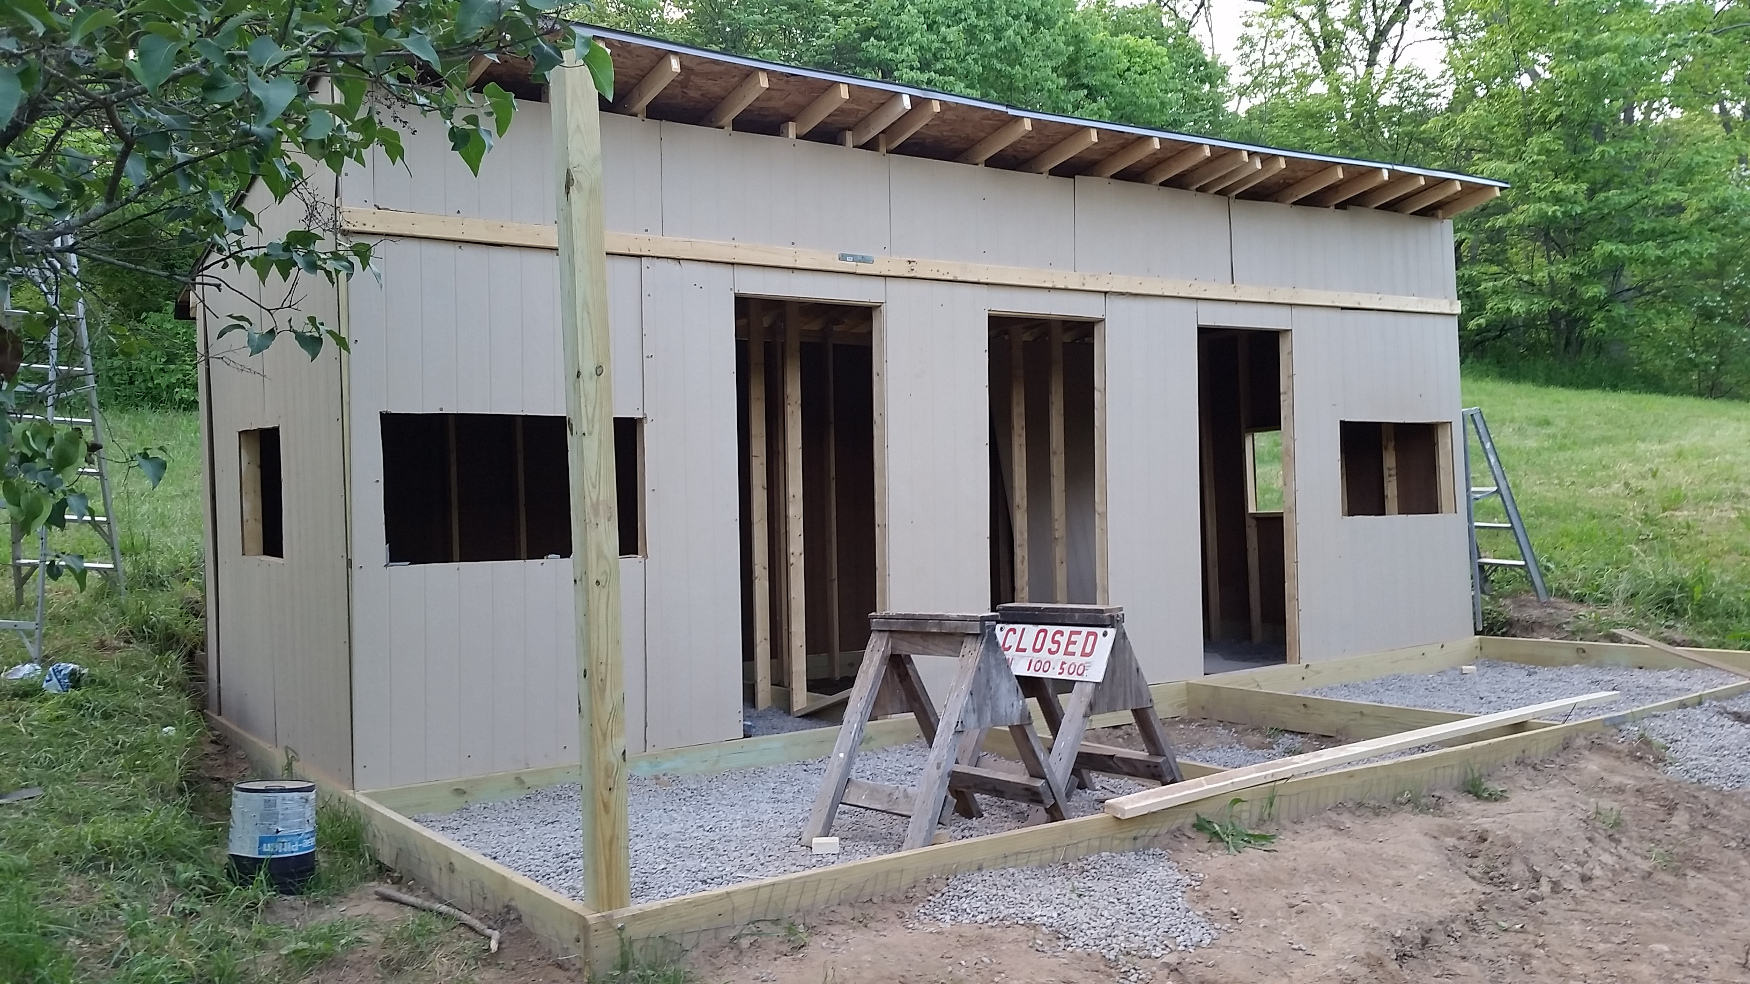
As you can see above, after constructing the frame in sections, it was laid down and bolted together atop a foundation of clay and concrete blocks. Then earth was filled back in around the outside and in middle to help level the ground.
Walls
The walls of the structure were primarilly 2×4 at 16-on-center intervals to make insulation easy. For red-tailed hawks, insulation is unlikely to be necessary. My sponsor advised me that it was easier to insulate the walls now, in the event I later wanted a southerly species, than to construct an entirely new facility later. So I built with insulation in mind. I had some insane thought that I might want to one day hunt with a cast of Harris Hawks. Then I got into the field with some and realized how overwhelming keeping track of two hawks could be. For the foreseeable future, my second chamber shall remain empty.
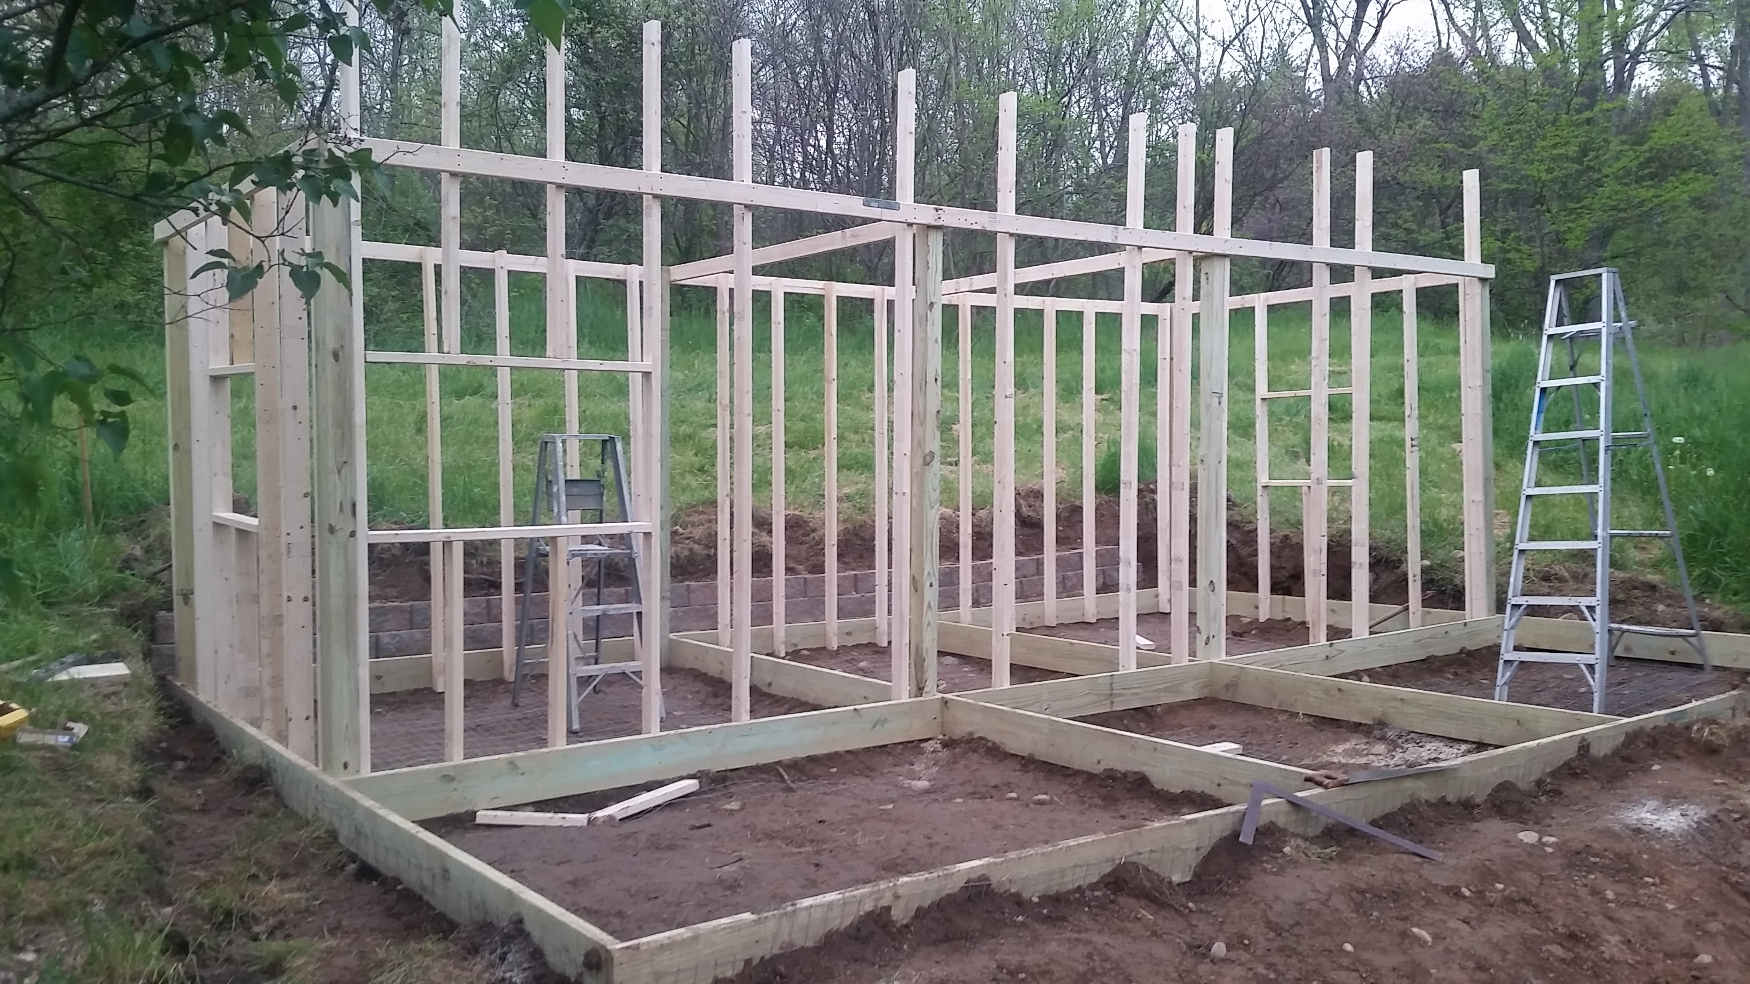
I say “primarilly” 16 inches on center because if you look closely at the frame throughout these photos, you’ll notice some gaps in the construction, particularly in the roofline. These had to be later filled in, frustratingly, and I do not recommend it. This is because I had a blueprint for a single chamber mews and I figured “It’ll be easy to double it and add a small room in between, right?” Wrong. If you, like me, lack all construction skills, “simple” and “with directions for 100% of it” might be a better choice.
We used pine lumber for most of this construction, either pressure treated or not, based on it’s exposure to the elements. It tends to be warped in the first place, which means you’ll have to deal with some uneven corners. Screws, clamps and lag bolts are your friends here. And beer. And swearing.
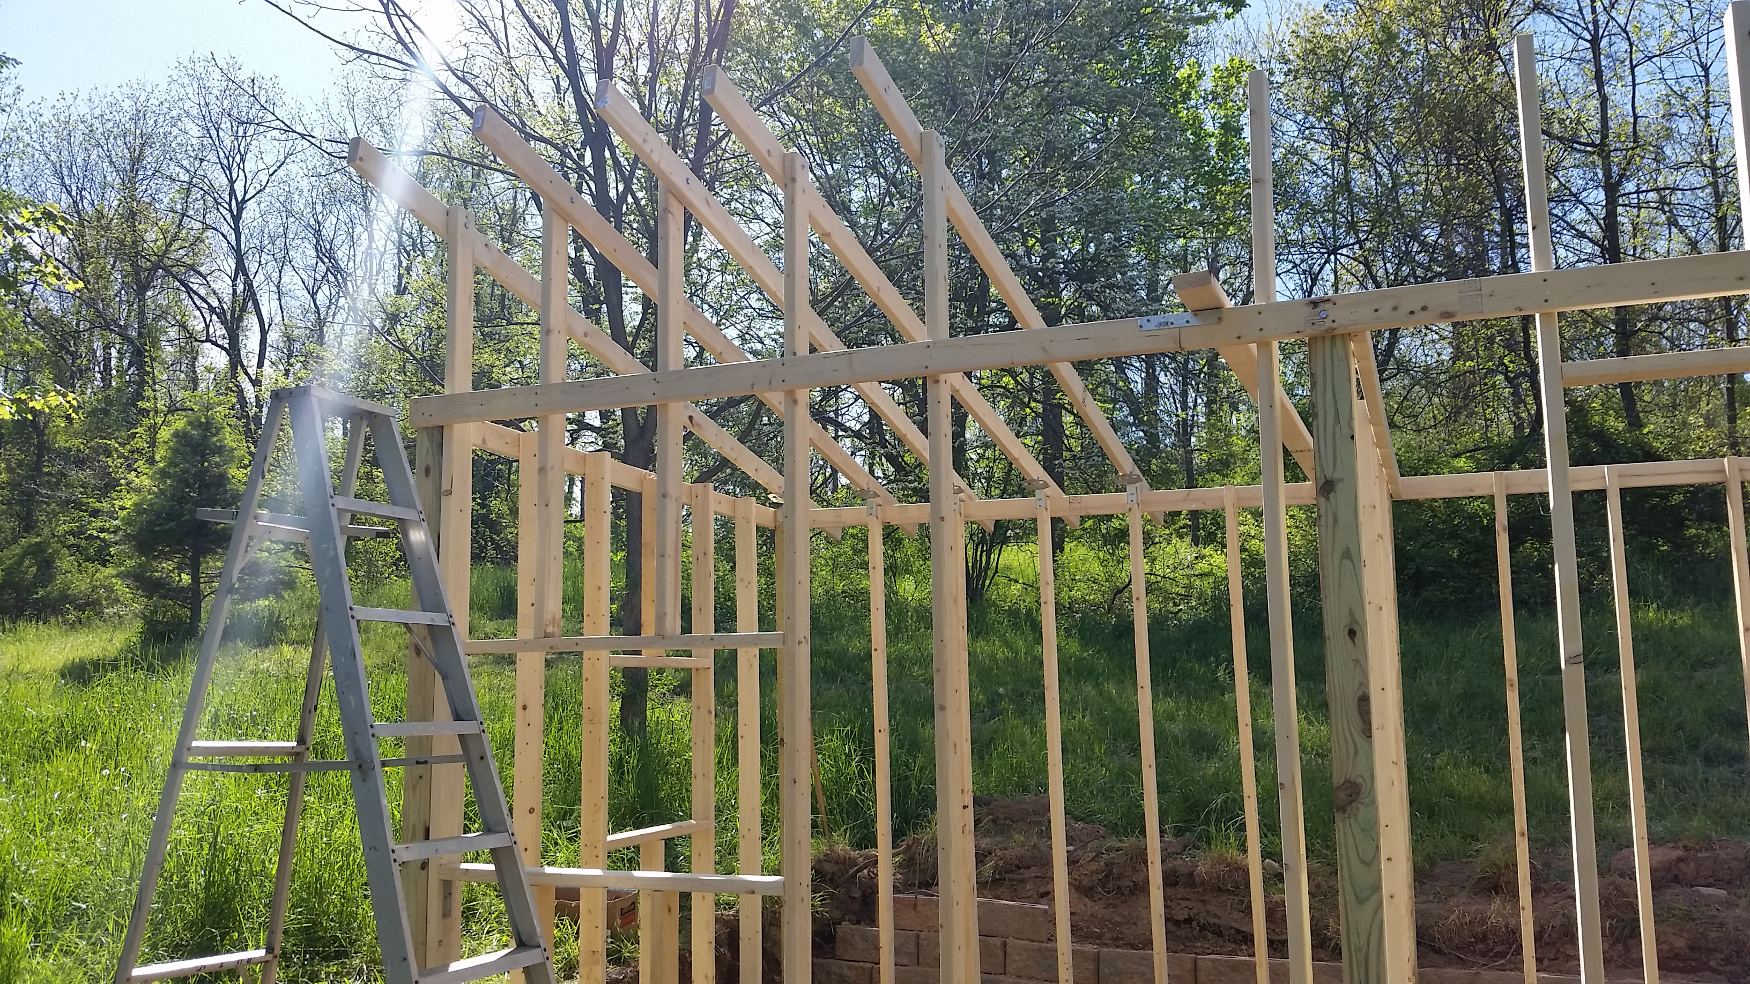
Mews roof
The roof of my mews uses the same shingles as my house. 30 year warrantied roofing. The last thing you want in animal housing is a leaky roof; it will make everything you do harder. It cost more, but thus far, it has been worth every penny.
One summer when I was 12 or so, I helped my father reroof our entire house. It’s hot nasty work, you will crush your thumbs with the hammer; I don’t recommend it at all. But if you like the idea of building the entire mews from scratch, as I did (before I attempted it, anyway), you’ll have to wade in and do this too. There are better guides on roofing than I will write here – find a few, read them, then put it together. At it’s heart, a roof is just plywood, a layer of roofing felt, and shingles laid in. The directions for shingles are often on the packaging, and if not, the internet search is your best friend.
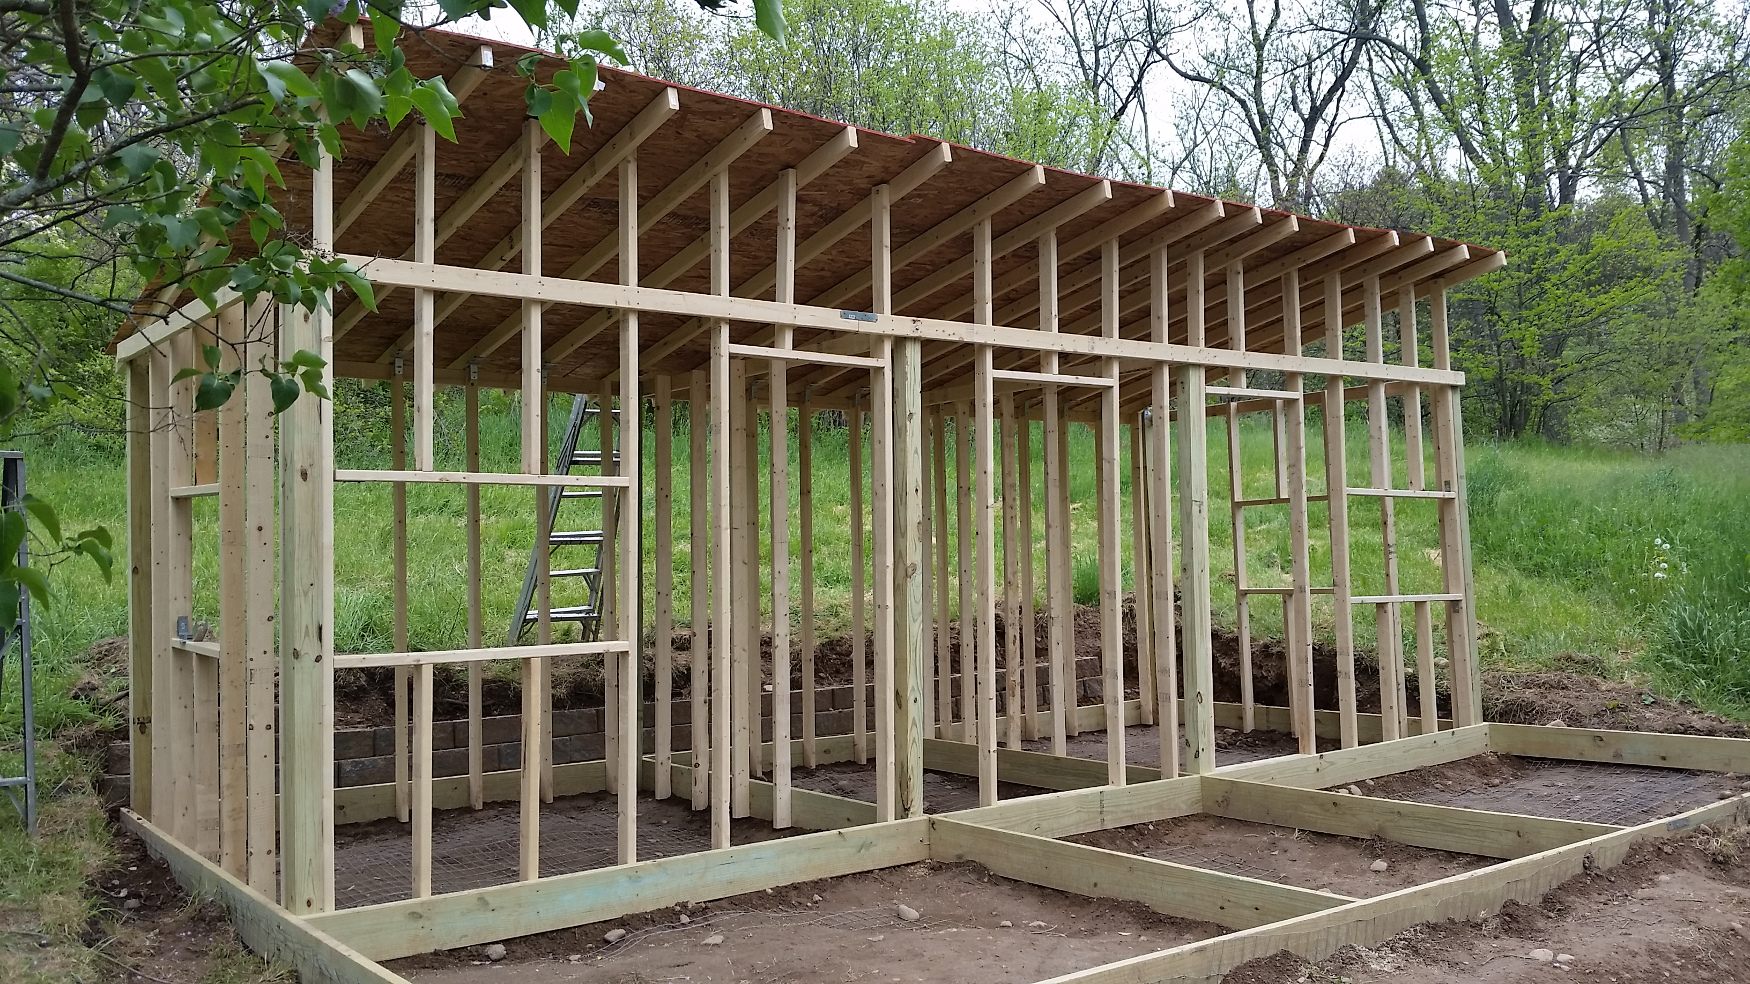
Siding
There are lot of options here. My sponsor used a pressure treated and sealed plywood. I used a painted MDF siding. Plastic is fine too. The main things are water tight and mold-resistant for the health of your bird.
As siding goes up you want to screw it in in such a way that you’re supporting the interior frame. Basically, imaging you are drawing triangles among the screws you put in. Somewhere, I read a book on the critical mass of screws necessary per square foot to hold a building up – I suggest doing some research here. But basically, unless you’re going to do cross braces within the walls, you want to be sure your siding and interior wallboard are sufficient to support the structure. A building this size does not, technically, require cross braces anywhere. You’ll notice I chickened out and put them in the weathering yard – we get a large snow load around here some winters.
Interior walls and insulation
This is pretty straight forward. Plywood and rolls of fiberglass insulation will do the trick. Lots of measuring and circular saw action.
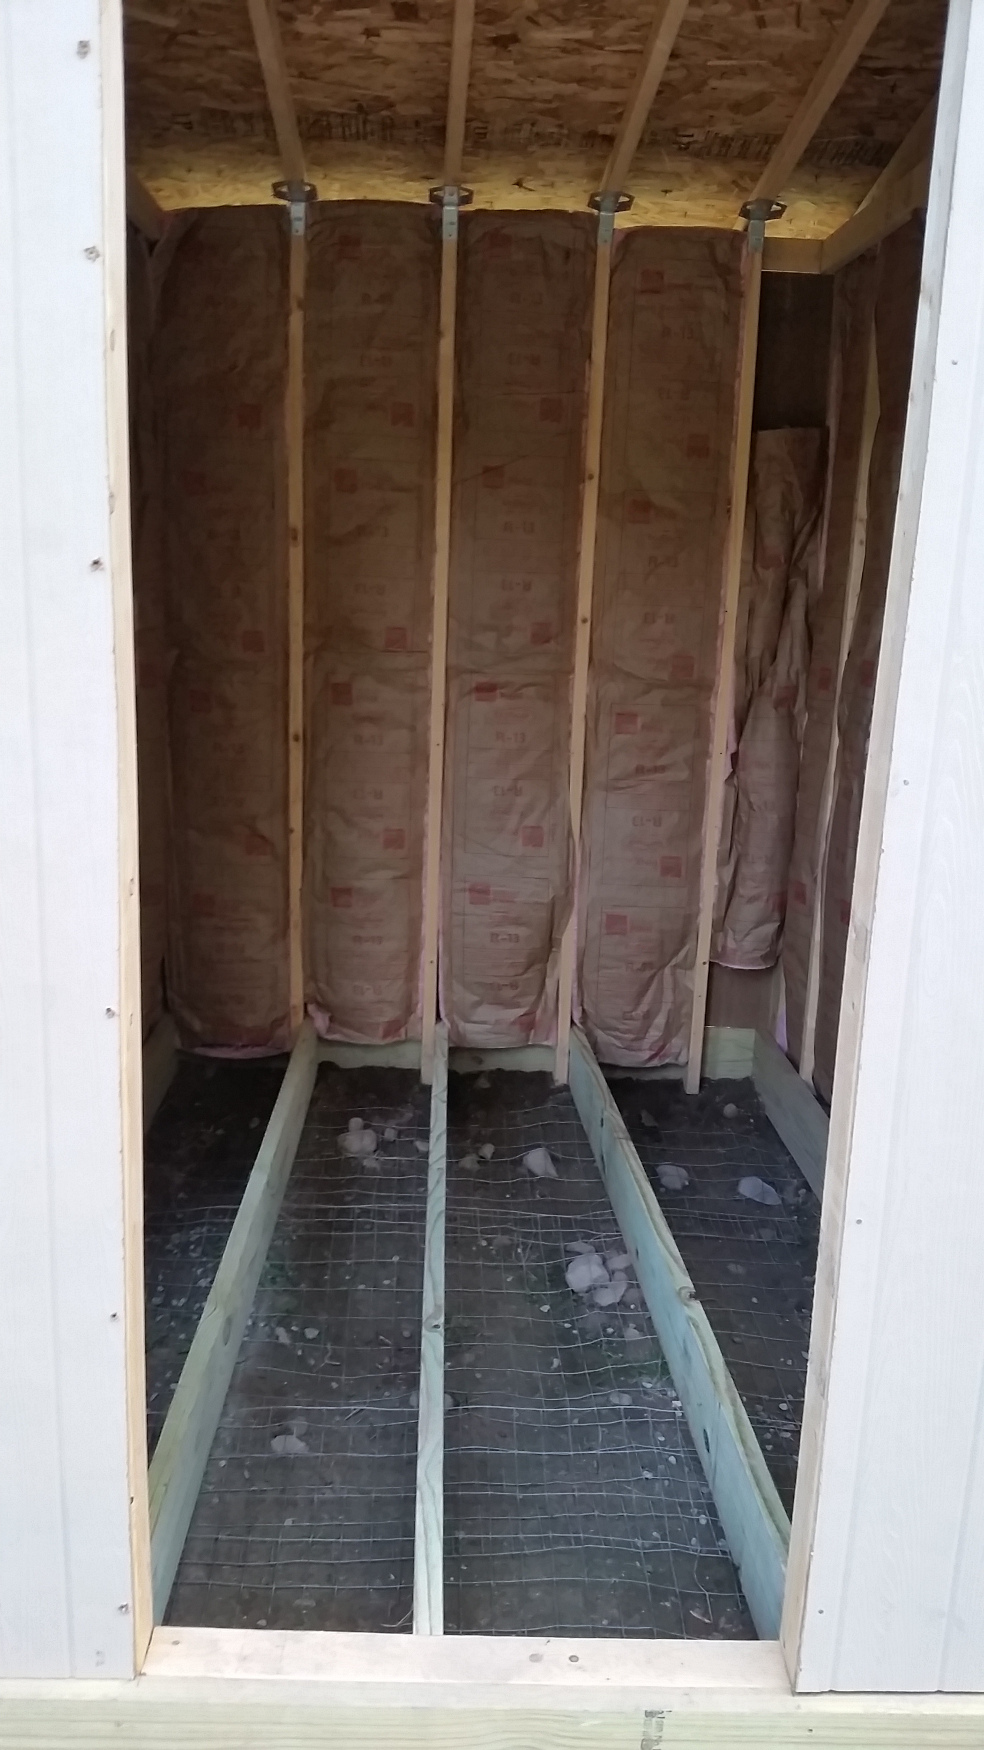

The first picture is from the exterior looking into the prep room before the floor is installed. Notice the gaps beneath the floor joists. I highly suggest you fill in voids like this, especially if you’ll be putting a freezer or any other heavy weight into your prep room.
In the second picture you can see the gravel floor that I put in for the mews chambers and weathering yard. Learn from my error – transport your gravel in before you finish the walls. Tossing shovel loads of stone through one narrow door is far more irritating than just pouring it into the frame would have been. Beneath this gravel is a second layer of galvanized wire mesh, giving me additional peace of mind that no tunneling mink or other varmint will be getting at my bird.
Finishing touches
I am not an expert at framing doors, and I live on a farm with old doors aplenty. I used what we had around, and the result is not terribly pleasing to the eye. You can do better, or not, as you like. The front door is not an exterior door and will not survive a second season. It will be replaced with an oak plank, varnished monster next year, suitable for stopping bullets or using as a truck ramp – but again, it’s made from parts we have around.

Weathering Yard
While an apprentice can only have one bird, I over constructed my mews to have two chambers, two weathering yards, and one connecting prep room. You can roughly halve this design and have a totally serviceable (and roughly 40% cheaper) mews.
The yard is covered in 1×2″ galvanized wire mesh – not chicken wire! Given the injuries that hawks can sustain grabbing galvanized wire, using chicken mesh could result in amputated toes or death.
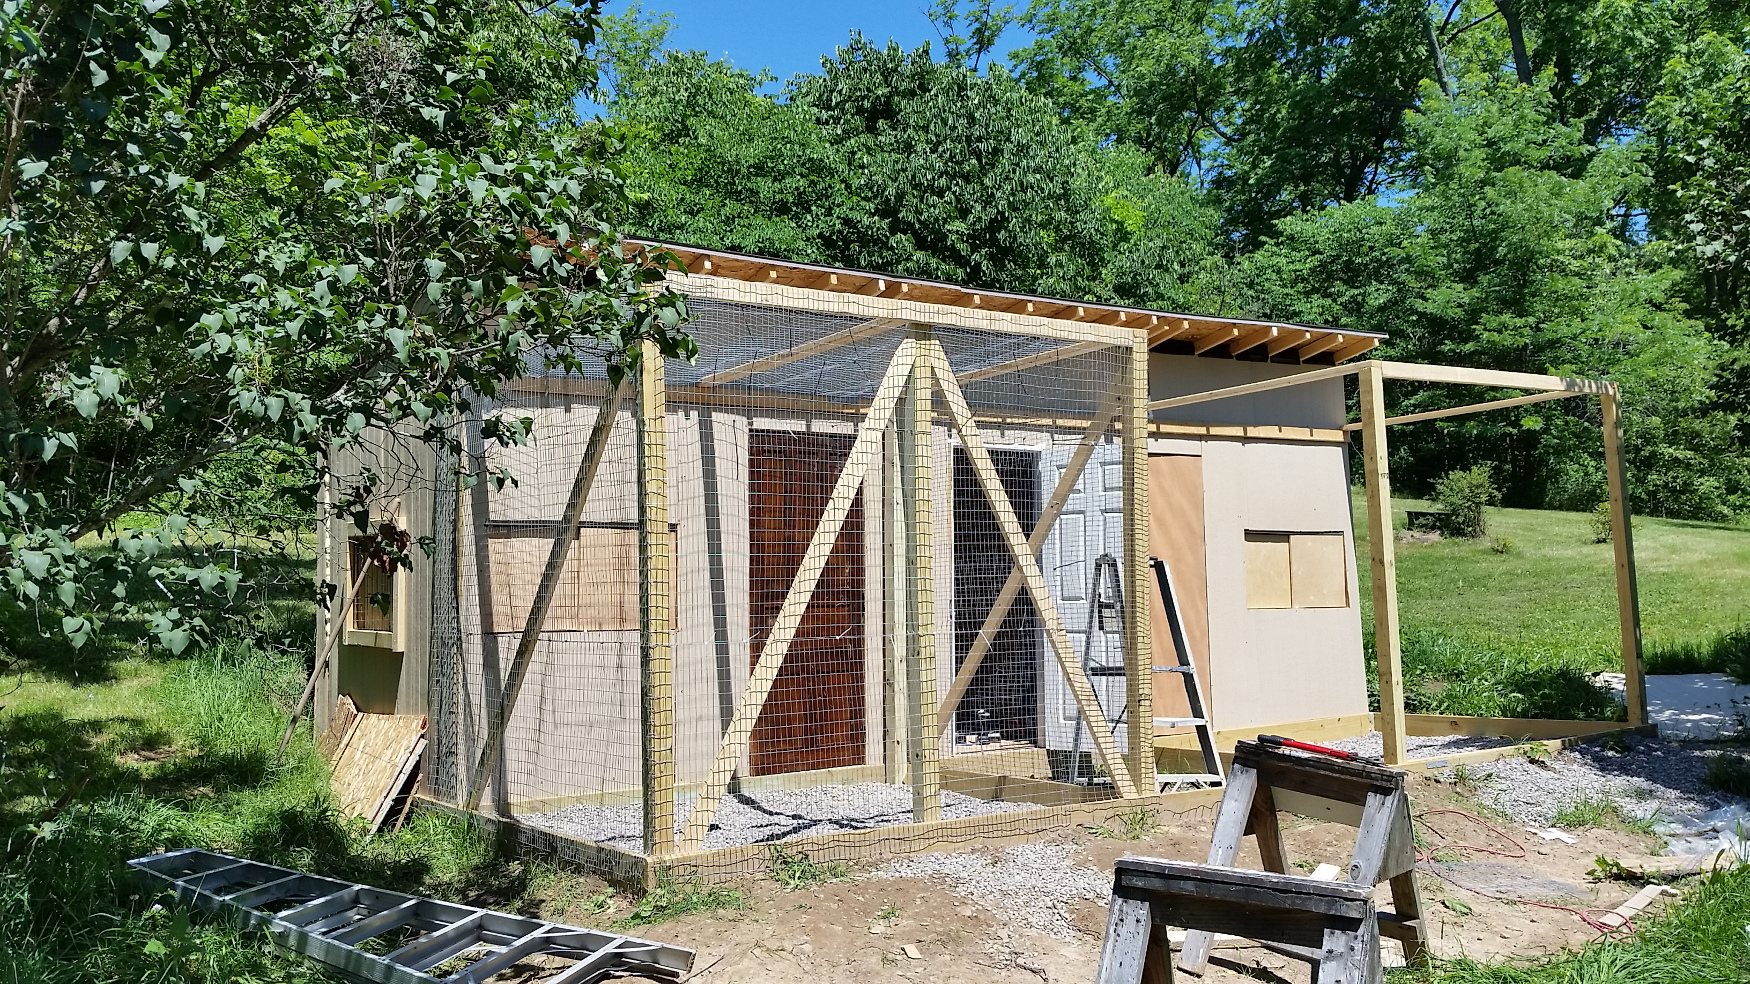
Note: this was originally written a couple years before publication here. While NYS regulations at the time only called for wire, it is strongly advised that dowel rod or PVC be used to separate a free-lofted hawk from the predator fence to prevent damage to feathers and feet. If you are tethering, this is still a wise precaution.
Wrapping up
And there you have it. As I said, many of the technical skills required for a truly beautiful structure, I lack. I can say that this one has been serviceable – it has not leaked, it is well drained, and the structure works. The front door sticks a bit, but I’ve lived in houses with worse problems. You can likely do better, but it is unlikely you can do it with less construction experience than I had. So if you’re feeling intimidated by the construction of a specialized building, take heart, because even a fool like me can do it.
I later added rudimentary plumbing (it freezes in the winter and involves a garden hose at several points, but during warmer months it simplifies life greatly. We also brought in an electric line sufficient for either a freezer OR a heater, one light, and a security camera. I am already considering that I need a larger amp breaker to accommodate a second chamber, and it would be nice to be able to run a heater and freezer simultaneously (though astute readers will note that an attentive falconer will never need both to be running at once).